Thursday

Tart with an onion heart

A little while ago I promised that I would post the recipe for a tasty onion tart. Well, today's the day. This delicious tart is a brilliant addition to your recipe file as it is perfect for an easy meal or, served in slightly smaller slices, a dinner party starter. The original recipe comes from Nigella's How to Be a Domestic Goddess. This is one of my favourite books by Nigella and it was given to me by a friend from university. We're no longer in touch, but every time I use the book, which is frequently, I smile as I remember her. That's the thing with books, they really are the gift that keeps on giving.

On Saturday I took advantage of having the house to myself (the Bedmate and the Housemate both skiing, not together, that would be a bit mean, but away nonetheless) and decided to have my Yorkshire friends around for dinner. There are seven of us lads and lasses who went to school together and are now navigating the big city in the south. In keeping with our White Rose roots, I tried to cook northern-esque dishes. I decided on beef and ale stew with Yorkshire puddings for the main course and I thought that this onion tart would be a suitably hearty first course.

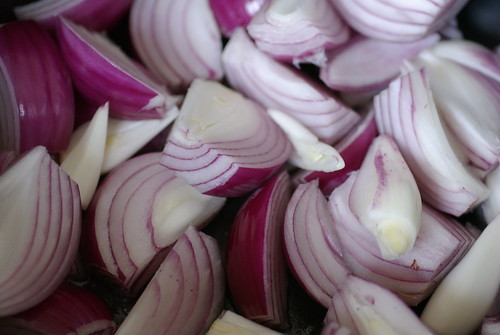
Nigella's recipe recommends strong cheddar or gruyere cheese in the scone base however, in a bid to increase the Yorkshireness, I used Wensleydale cheese. Wensleydale is a mild, crumbly, creamy cheese which is traditionally produced in Hawes in the Yorkshire Dales. We tend to eat it with Christmas cake instead of icing and marzipan and I particularly like it in sandwiches with slices of crisp, sharp apple. To be honest, the stronger cheeses have more of a presence in this little tart, but I did enjoy the milder Wensleydale. I paired the tart with a baby leaf salad with shards of cheese and braeburn apples tossed in. Yum.

This dish is good to make in advance if you're trying to reduce stress at dinner parties. I tend to cook the onions in advance and leave them until I'm ready for the dough. Do be careful when you're cooking the onions; you want them to be soft and mellow. Don't get distracted by helping your best friend write an online dating profile and let them burn. Oops. Sometimes the onions can be a bit bitter so I add a teaspoon of brown sugar and a splash of balsamic vinegar to calm them down.

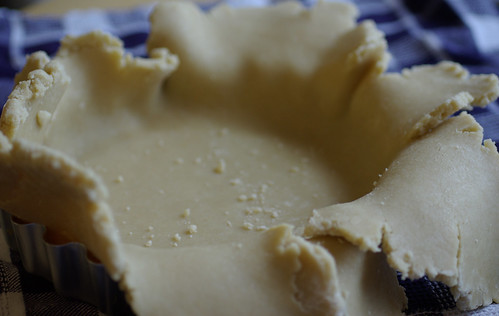
I made individual tarts this time because I wanted to use my new mini tart tins (50p each from Heals and so cute). 
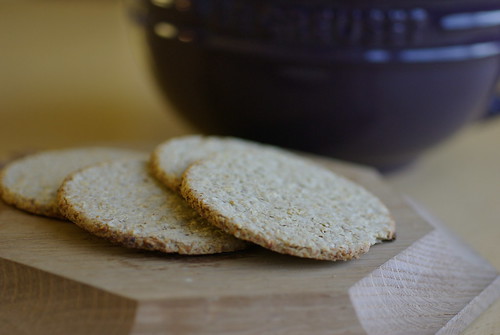
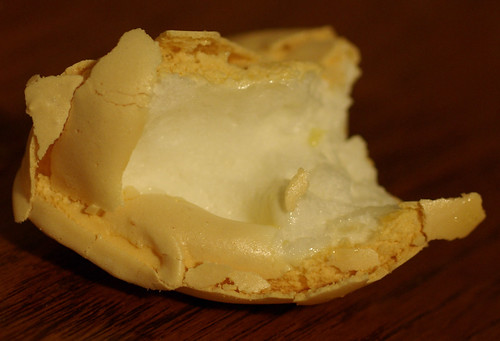
You can use a large dish if you prefer. I recommend a loose bottomed tin so that it's easier to turn out. The scone dough can be made ahead of time as well, but I would put some greaseproof paper over the tarts so that the dough doesn't dry out. These are also delicious cold.

I apologise for the lack of photos of the final result. As usual, I'm madly busy when it comes to serving food so I always miss the chance to take photos. How does everyone else deal with this? Of course, I still haven't told people about this blog so photo taking is always a bit conspicous even if I do have time. Even though they won't be reading this, I do love my home friends. We had such fun reminiscing and talking up the old country it really made my weekend.

Onion Upside Down Tarts
4 medium red onions (about 750g)
1 tablespoon olive oil
1 heaped tablespoon of butter (about 25g)
3-4 sprigs of thyme, destalked (or 1/2tsp dried thyme)
1 tsp brown sugar
Splash of Balsamic vinegar
200g Wennslydale Cheese or strong Cheddar or Gruyere grated
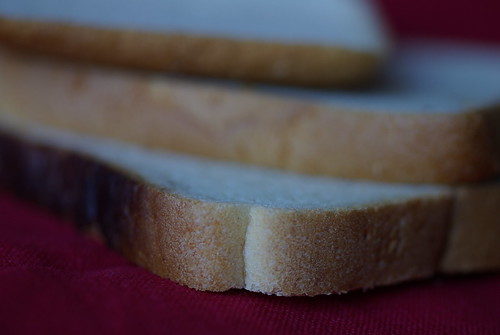
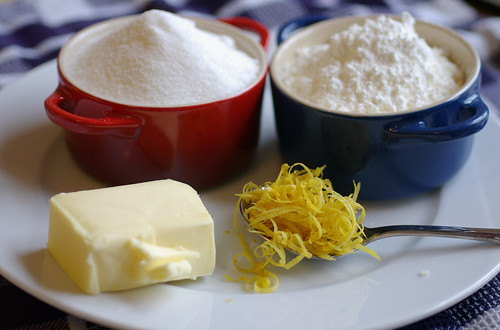
200g plain flour
1 scant teaspoon of baking powder
1 tsp salt
100ml milk
40g butter, melted
1 scant teaspoon of English mustard
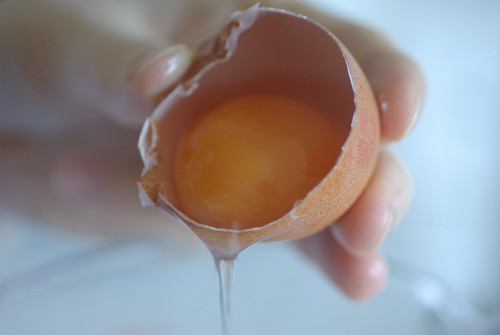
1 large egg, beaten
  1. Preheat the oven to 200 degrees celsius.


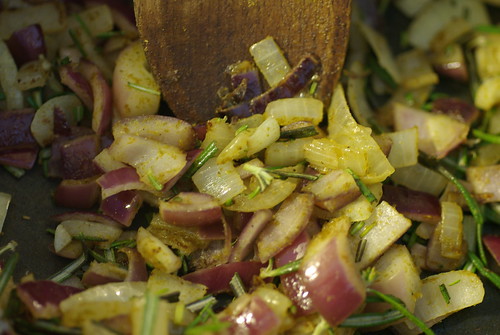
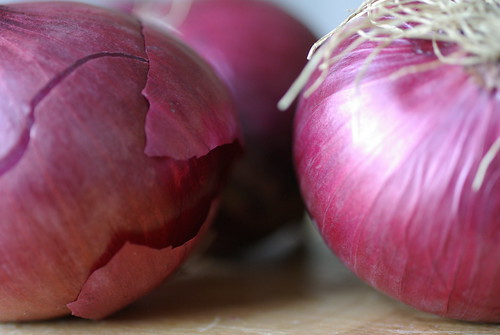
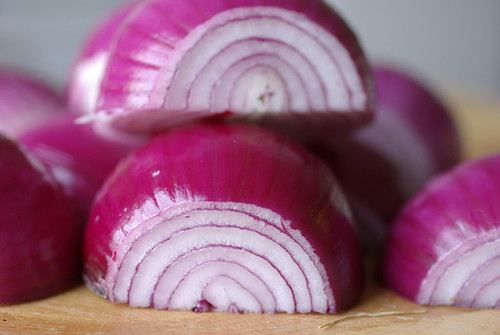
  2. Peel the onions and cut them in half and cut each half into four segments.

  3. Heat the oil and butter in a pan and then add the onions. Cook over a medium heat for 30 minutes, stirring regularly. The onions should be soft and tinged with colour.


  4. Season with salt and pepper and add the brown sugar and Balsamic vinegar to taste.

  5. Put the onions in the bottom of your tin and sprinkle the thyme over the top. Then sprinkle about 50g of the cheese across the onions.


  6. Leave the onions while you make the scone dough. Put the flour, baking powder and salt into a bowl with the remaining cheese.

  7. In a measuring jug thoroughly mix the milk, mustard, egg and the melted butter. Pour into a well in the centre of the dry ingredients and mix with a fork or your hands. The dough should be quite sticky so add a splash more milk if it feels overly dry.

  8. Turn the dough onto a lightly floured board and shape into one large round or enough for your little tins (5-6 tins) and then press the dough onto the onions. Be sure to seal the edges.

  9. Put the tarts into the oven for 15 minutes and then turn the oven down to 180 degrees for a further 10 minutes or until the dough is crisp and golden.

  10. Let the tarts rest for 5 minutes and then invert the dish onto your serving plate so the onions are on the top. Yum.

Sunday

She Who Dares Bakes

One of the reasons I started this blog was to be part of a community. I saw people sharing their lives as they shared their recipes and I wanted to be involved. Normally I'm reluctant to try and be part of something that's already so established - I fear being derided as a pretender or a mere follower. As soon as something is declared to be the 'in thing', I declare that it's not for me. Back in the day when Brad Pitt was first outed as being the man to fancy I decided that I couldn't see it. A decision that I'm sure still causes Brad to silently sob every night.

Of course, this stupid mentality can mean missing out. I'm thankful that I was able to set aside my stubborn ways and not only start this blog but ask to be a member of the Daring Bakers (asking to be part of something is also a big deal for me; I fear I have rejection issues).

As I'm sure you all know, the Daring Bakers are people who live to bake. Each month one member picks a recipe to push everyone out of the baking comfort zone and then write about it. I love the idea of a cooking club. When I was in the first year of secondary school my friend and I started one with the help of one of the Home Economics teachers. We were allowed to choose a recipe and the teacher would help us make it after school. I remember choosing Black Forest Gateaux, something my Mum would never have sanctioned me making at home (too showy).

It was with great excitement that I tackled my first challenge as a Daring Baker: Lemon Meringue Pie. A recipe picked by Jen at The Canadian Baker. This was a great recipe for me to ease into the group as it's something that I've made a few times before (not always without tears). As my recent collection of citrus recipes shows, the zing of these fruits is a perfect way to make you feel alive in January.

When making LMP I tend to use Delia's version. The curd is sharp and yielding and the meringue manages to be light yet substantive. Bliss. I feel for people who only know LMP from the lemon washing up liquid tasting versions that are churned out in canteens and supermarkets. They're missing out.

I took the pie to my friend's house for dinner in my fantastic cake carrier which caused quite a few looks on the tube (don't people know that Tupperware is the new Louis Vuitton daaaaarling?). Everyone enjoyed the pudding, as did I, but I couldn't help feeling that I actually prefer the Delia version. It's really hard for me to admit that as isn't it terribly rude to join the Daring Bakers and then whinge about the recipe in the first post? I thought that the pie looked spectacular. The pile of meringue, the thick layer of curd and the golden crust were everything a LMP should be. However, I prefer my crust to be a bit more crumbly; I thought the addition of so much water made it too hard and crisp. I also felt that the curd had too much cornflour. The texture was a bit too gelatinous and the flavour wasn't as vibrant as I would have liked. Of course, this could all be down to how I made the pie so I am very interested to hear what other people think.


I managed to make one whole pie and a collection of mini pie bites which I served with Greek yoghurt mixed with a little honey and grated ginger. Yum.


Lemon Meringue Pie

Makes one 10 inch pie


Crust
180g cold butter cubed
475g plain flour
60g granulated sugar
80ml iced water
1/4tsp salt

Filling
475ml water
240g granulated sugar
120g cornflour
5 egg yolks, beaten
60g butter
180ml fresh lemon juice
1tbsp lemon zest
1tsp vanilla extract

Meringue
5 egg whites at room temperature
1/2tsp cream of tartar
1/4tsp salt
1/2 tsp vanilla extract
180g sugar


For the Crust:


  1. Make sure all ingredients are as cold as possible. Using a food processor or pastry cutter and a large bowl, combine the butter, flour, sugar and salt. Process or cut in until the mixture resembles coarse meal and begins to clump together.

  2. Sprinkle with water, let rest 30 seconds and then either process very briefly or cut in with about 15 strokes of the pastry cutter, just until the dough begins to stick together and come away from the sides of the bowl.

  3. Turn onto a lightly floured work surface and press together to form a disk. Wrap in plastic and chill for at least 20 minutes.

  4. Allow the dough to warm slightly to room temperature if it is too hard to roll. On a lightly floured board (or worktop) roll the disk to a thickness of ⅛ inch.

  5. Cut a circle about 2 inches larger than the pie plate and transfer the pastry into the plate by folding it in half or by rolling it onto the rolling pin.

  6. Turn the pastry under, leaving an edge that hangs over the plate about ½ inch (1.2 cm). Flute decoratively. Chill for 30 minutes.

  7. Preheat oven to 180ºC. Line the crust with foil and fill with metal pie weights or dried beans.

  8. Bake for 20 to 25 minutes. Carefully remove the foil and continue baking for 10 to 15 minutes, until golden.
  9. Cool completely before filling.

For the Filling:


  1. Bring the water to a boil in a large, heavy saucepan. Remove from the heat and let rest for 5 minutes.

  2. Whisk the sugar and cornstarch together. Add the mixture gradually to the hot water, whisking until completely incorporated.

  3. Return to the heat and cook over medium heat, whisking constantly until the mixture comes to a boil. The mixture will be very thick.

  4. Add about 240 ml of the hot mixture to the beaten egg yolks, whisking until smooth.

  5. Whisking vigorously, add the warmed yolks to the pot and continue cooking, stirring constantly, until mixture comes to a boil.

  6. Remove from the heat and stir in butter until incorporated. Add the lemon juice, zest and vanilla, stirring until combined.

  7. Pour into the prepared crust. Cover with plastic wrap to prevent a skin from forming on the surface, and cool to room temperature.


For the Meringue:

  1. Preheat the oven to 190ºC.

  2. Using an electric mixer beat the egg whites with the cream of tartar, salt and vanilla extract until soft peaks form.

  3. Add the sugar gradually, beating until it forms stiff, glossy peaks.

  4. Pile onto the cooled pie, bringing the meringue all the way over to the edge of the crust to seal it completely. Bake for 15 to 20 minutes, or until golden. Cool on a rack. Enjoy!


Tip from Joy: In order for the egg whites to whisk properly the bowl needs to be scrupulously clean. Run a lemon wedge around your bowl before adding the egg whites as this gets rid of any grease.

Tuesday

Gather ye Seville Oranges while ye may

Like many people I try and eat seasonally. Of course I miss summer fruits at this grey time of year, but I find the sight of swollen strawberries coupled with those limp little raspberries really perverse. As in other areas of life, being overly available is not always a good thing. So, it's with real excitement that we usher in the short and definitely not sweet Seville orange season.

Seville oranges are only available from mid January until February and no number of Tesco polytunnels will change this.* These bitter little oranges are the foundation of one of my favourite foods: Marmalade. As I've already confessed, I have a bit of a thing for toasted cheap white bread. I know it's got the nutritional value of cotton wool, but hey-ho, at least I'm honest. I spent many a happy afternoon at university eating Sunblest bread coated in butter and marmalade. Yum.

My first memory of marmalade is my mum's homemade chunky Dundee version. Mum doesn't have a sweet tooth and so this dark treacley spread didn't really appeal to my young palate. In fact, it was only once I was introduced to the delights of the light, sugary Robinson's version that I realised how much I liked it. Sorry mum.

On Sunday I attempted my first homemade Seville orange marmalade using the same book that my Mum took her Dundee recipe from, reassuringly spotted with past successes.
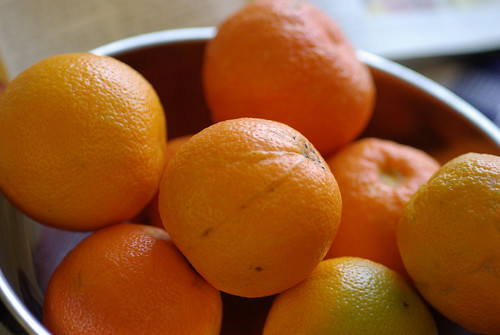
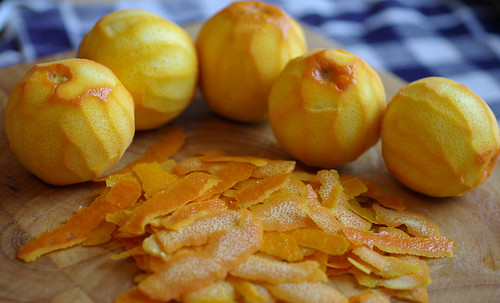
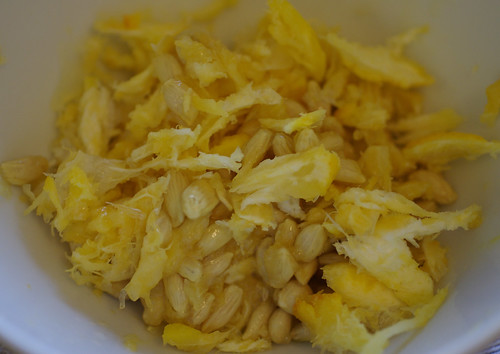
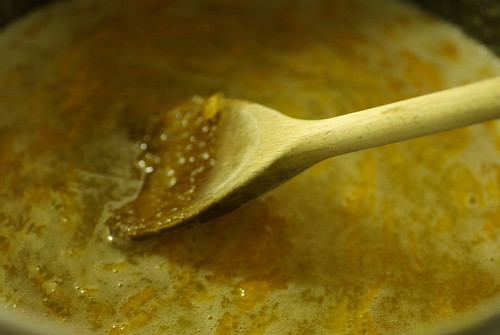
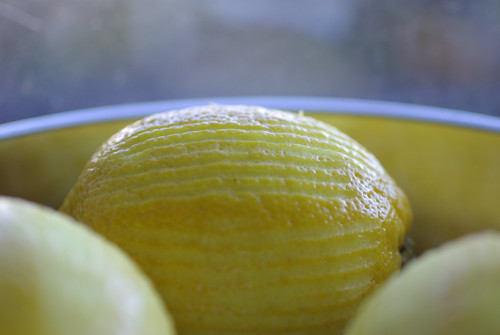
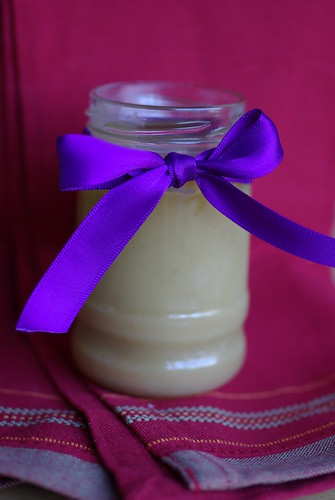
The process of peeling and chopping the fruit is very therapeutic. There is also something so appealing about filling freshly cleaned jam jars with the amber mixture, knowing that even if the worst happens you will always have a store of something you have made yourself.

Unfortunately I was denied the pleasure of merrily labelling my treasure and decorating the lids with little circles of fabric. Yes, I went wrong. Despite buying a new sugar thermometer for the marmalade-making I refused to trust it. Call me a Luddite, call me stupid, but when the thermometer told me that setting point had been reached after only five minutes, I decided that it couldn't be possible. So, a little later and a few degrees higher, I ended up with marmalade toffee rather than the unctuous jelly for my toast. Oh dear.

I promise that before the marma-rock solidified the flavour was perfect. So, please do try this recipe but don't think that you are above your thermometer!


Classic Seville Marmalade
Yields 10lb - you can scale the recipe down but remember that cooking times may need to be reduced slightly to compensate.

3lb Seville oranges
Juice of 2 lemons
6 pints of water
6lb preserving sugar
  1. Remove any stalk ends from the oranges, give them a good scrub and dry thoroughly.

  2. Using a potato peeler or a sharp knife peel the rind from the oranges in thin downward strips. You just want to take the coloured rind and leave the white pith on the orange.


  3. Cut the rind into thin strips using scissors. I prefer thin strips but you can leave them chunkier if you prefer. Set this peel aside.


  4. Cut the oranges in half and and squeeze all the juice. Be sure to save the pips as these will be used later.

  5. Once you have extracted all the juice and the pulp from the oranges you can slice the white pith from the inside of the orange skins. The pith is the white material that you normally spend ages fastidiously picking off segments when you eat them. I found that the easiest way of doing this is to turn the empty skins inside out and use scissors to cut it out.


  6. Chop the pith roughly and gather it together with the pips. Place together in a square of muslin and tie tightly. Unfortunately I didn't have any muslin so I did some Blue Peter style improvisation and used the toe of some clean tights!


  7. In a large pan put the orange juice, pulp, shredded peel and your little bag of pith. Add the lemon juice and the water.

  8. Bring the fruit mixture to the boil over a low heat and simmer, uncovered, for about 2 hours or until the peel is soft and the mixture has reduced by about half. Please note that this will take less time if you have reduced the recipe.


  9. Remove the bag of pith and add your sugar. Stir constantly until the sugar has dissolved. Turn up the heat and boil the mixture rapidly until setting point has been reached. Setting point is 220 degrees Fahrenheit using a sugar thermometer. Note to self: remember this.**

  10. Leave the marmalade to cool for about 10 minutes and then remove any scum from the surface.

  11. Pour your delicious citrus mixture into your sterilised jars and enjoy. Cheap white bread is optional.

* If, however, you want to buy Seville oranges now but don't have time to make marmalade you can freeze them whole.

** If you don't have a thermometer you can also check whether setting point has been reached by chilling a saucer in the fridge and then pour a little marmalade on to it. If a wrinkled skin forms within a few minutes then it is good to go.

Sunday

Putting Some Zest Into January

January is a bi-polar month. As much as I love the brand-spanking new feeling of anything being possible and the next 366 days being a chance to be the best person I possibly can, it's also rather bleak. There are all the standard reasons: no money, stringent resolutions, being back at work (is it only me that hopes to be bumped into by a car on the way to the office to get a few weeks off work with a broken leg?), but there's also that heavy weight of self-analysis at this time of year: am I living life or is life living me?

I'm sure that many people have these grey feelings at this time of year and the malaise is not helped by the miserable old weather. It's hard to walk around with a spring in your step when you feel that if you were able to spring, you'd bash your head on the blanket of cloud seemingly only a few feet above you. Nature, however, is not all bad. It may be monochrome outside, but inside there are citrus fruits. Not only is the vibrant peel of a lemon a reminder that colour will, one day return, the flavours give life to your taste buds and can help give a renewed sense of vigour.


A little while back I was feeling a little 'timesick'. Do you ever get that feeling when you are thinking about a time in the past and you can remember it so vividly that the longing for it is almost tangible? I was missing being little. Coming home from school, mum being in the kitchen and nothing to worry about but tomorrow's spelling test, little. One thing I remember my Mum making at this stage was lemon curd and, in my timesick state, I decided to make a couple of jars. Once I'd made the curd and smeared it on a thick slice of toast (as in the old days) I felt like a little of the little me had returned.

I've had a spare jar of the curd in my fridge for a month and since, for January, I am trying not to eat as much toast (does anyone else think a group of toast-eaters anonymous would be very useful?) I was trying to think of other ways to use it.* I've had it stirred into Greek yoghurt, directly from the jar, a-top apple sauce and had considered a lemon curd roulard, but thought this would be better in the summer with some fresh raspberries. In the end, I decided to make my own lemon version of a bread and butter pudding. The perfect combination of winter comfort with a citrus, January's not that bad, kick.

The end result was delicious. The lemon really lifted the standard bread and butter pudding and although the ginger scented custard wasn't as powerful as I would have liked, a hint of the flavour was there. I was hoping to make a caramelised crust using my new Christmas blow-torch but unfortunately it hadn't come with any gas and as the grill was refusing to work, the crust wasn't to be. I made a mini-version of the pudding in my super cute dishes, but I have scaled it up to serve four below. Not only is this a great winter pud, I also think that it could be a great brunch dish.


Basic Lemon Curd
(makes approximately 1lb)
Grated rind and juice of 2 large lemons
3 eggs
4oz butter
8oz sugar (I used light brown sugar, but I think caster would be better)
  1. Beat the eggs lightly and mix in the lemon rind and juice, butter and sugar.

  2. Place in the top of a double boiler or in a bowl over simmering water.
  3. Heat gently, stirring occasionally until the sugar has dissolved and the curd thickens.

  4. Pour into clean, dry jars and cover with a circle of waxed paper.

  5. The curd should be kept in the fridge and used within a month.

    Lemon Bread and Butter Pudding
    8 slices of white bread (stale is best - I used the last few slices of my pre-2008 cheap white loaf**)
    3oz sultanas or raisins (I also think that dried cranberries would work well)
    2 large eggs
    2 level tablespoons of light brown sugar and a little more for the top
    1 pint of milk (use semi-skimmed or whole milk)
    8 tablespoons or so of lemon curd
    Extra butter for the bread (optional)
    1.5cm fresh ginger root grated
    1 teaspoon ground cinnamon


  1. Remove the crusts from the bread. If you are making individual puddings you will want to cut the bread into the same shape as your little dish. Otherwise you can cut the bread into triangles.


  2. Heat the milk slowly with the grated ginger root and allow it to cool down so that the milk takes on the flavour. The flavour was very subtle when I did it, so if you want it to be stronger you could grate a little extra ginger to layer between the bread.

  3. Lightly beat the eggs with the sugar and add the cooled milk. Beat together.


  4. Spread your shapes of bread with a thin layer of butter (this is optional) on both sides. Then smear your lemon curd on both sides. I spread reasonably thickly.


  5. In a lightly buttered dish lay the first layer of curded bread. Sprinkle half of the dried fruit (and ginger if you want extra) onto the bread and then half of your egg/milk layer. I held down the bread with a wooden spoon to make sure it was soaking up all of the eggy mixture.


  6. Add the second layer of bread and top with the remainder of the dried fruit and the egg mixture. Sprinkle the cinnamon across the top.

  7. Bake the pudding in a preheated oven (180 degrees) for approximately 30 minutes or until the egg has set and the top is golden.


  8. Once the pudding is cooked sprinkle the remaining sugar on the top and place under a hot grill to get a nice crust.


* Fruit curds should be eaten within one month or so.

** I know it's not very foodie, but I love toasted cheap white bread like roses love the rain.

*** Just a quick note to say that Savina Tessitore was the winner of my Menu for Hope prize. Thank you so much for bidding Savina (and the others who also purchased a ticket). I am very grateful and proud that Menu for Hope raised over $90,000. Wow! Please get in touch Savina, I'm in the middle of making your prize...

Puritanical Soup

So, 2008 is all about detoxing mind, body and soul. I'm trying to avoid trashy TV shows and gossip magazines (well, apart from in the hairdressers) as well as trying to spend less time with those toxic people that don't do anything but make you feel rubbish about yourself. Foodwise, I'm trying to cut out anything processed and just enjoy my own cooking. Whenever I 'treat' myself to cakes and biscuits on the run, I'm always disappointed. Not only do they taste sub-standard but they're full of wonky ingredients. Well, anyway, that's the plan.

Yesterday I met up with my lovely friend Y (she of the heart-patterned oven gloves) at the wonderful Books for Cooks in Notting Hill. I first heard about this bookshop a couple of years ago but I was reminded of it on Oswego Tea's blog. The shop is a must if you are in London. It has the most marvelous range of cookbooks and there's even a sofa so you can look at them properly. I was very excited to see the Junior's Cheesecake recipe book that I resisted in New York, but I resisted once more for the sake of the New Year health kick. However, if I see it again it will clearly be fate and I'll have to get it, cheesecake calories and all.

Books for Cooks has a little cafe at the back of the shop where they make homemade dishes from their numerous recipe books. Yesterday when Y and I arrived for a late lunch they only had cakes left. Clearly the God of healthy-eating plans couldn't punish me when I ordered the prune and custard sponge, given that there was no alternative. Besides, the fact that the cake was homemade it fit right in with my no processed foods rule. A real treat.

After our cake and tea we went looking for the spice stall on Portobello Road market, alas it wasn't there. I had planned to toast and grind my own spice blend for tandoori chicken but in the end I had to buy a ready prepared mix from the local Indian store. It was good, but I felt cheated out of doing it myself. What I did make this weekend was a soup inspired by Y. She told me about a very simple lentil soup she'd made and it sounded like a perfect New Year dish.

I'm not going to lie to you; this is not a jazzy recipe. It's a frugal dish but it's also a wholesome one. I wanted to keep it very simple, but I've included additions which may be more to your tastes.

Puritanical Lentil Soup
This makes a large pan full of soup - perfect for taking into work if you're also on a post-Christmas money saving stint as well.


500g red split lentils
4 large carrots peeled and diced
2 onions peeled and diced (I used one red and one white)
2 cloves of garlic crushed
1 heaped teaspoon cumin seeds
1 tablespoon olive oil
2 litres chicken stick
Juice of half a lemon
Salt and Pepper
2 tablespoons chopped fresh rosemary*

  1. Put the lentils in a bowl of water to allow any grit to float to the surface. Discard the water.

  2. Heat the oil in a large saucepan and gently fry the onions and garlic. Add the cumin and the rosemary and fry over a gentle heat until the onions are soft and the scent of the cumin is released.

  3. Add the carrots, lentils and stock to the pan and bring to the boil. Reduce the heat and simmer for around 40 minutes or until the lentils have broken down and the carrots are soft.

  4. Add salt and pepper to taste. Blend the soup.

  5. Add the lemon juice.

  6. I served mine with the equally no frills oat-cakes.

Variations:
Add a heaped teaspoon of ground ginger or some fresh ginger root along with the cumin. You could also add other spices such as coriander seeds or even curry spices to produce a dahl type soup.

Fry some bacon or pancetta along with the onions and then keep it to the side and sprinkle on the soup at the end.

Serve the soup with caramelised onions or toasted seeds sprinkled on top of the soup.


* I couldn't resist the rosemary from Portobello Market - it smelled so good. I might put a bunch of it in my laundry cupboard to scent the sheets. The green smell will help me get over the loss of the Christmas tree which we took down today - booooo.

Tuesday

Hammy New Year

A very happy new year to all of you. I hope you've enjoyed the holiday period and are feeling well rested and ready for 2008.

The start of a new year is full of such promise. There's something so exciting about a blank diary and the opportunity for a fresh start. As usual I have a host of resolutions* and the desire for reinvention. One of these years I'll realise that, as the Housemate so wisely says, "those that are truly happy desire what they already have" but maybe next year.

As much as I love the start of a new year, I'm not a big fan of New Year's Eve. The frivolity is all a little forced. It's so hard to actually organise what you're doing because people are so wary of committing to anything lest they miss out on a fuure invite to the 'party of the year'. Inevitably you end up paying £25 to get into a bar you would never normally consider and spend the whole night wondering how you're going to get a taxi home. My favourite New Year's Eve since reaching the age where it was no longer socially acceptable to stay at home with parents was the one I had tonsillitis. How I rejoiced when I realised I had a legitimate excuse to stay in bed and watch the rubbich TV counting down to Big Ben's bongs.
This year we rejected the hustle and bustle in favour of a dinner at home. Because of my self-imposed lock down on all calorific foods post January 2nd (you've got to allow New Year's Day to ease into it) we decided to go a little nuts with the treats. Not only did we have all the Christmas chocolate to finish, I also made a chocolate loaf cake and the housemate made his mum's chocolate mint mousse. There may also have been some ice-cream and additional cookies...

In order to line our stomachs before the assault of the sweets, I wanted to make a balanced main course. I decided to go for a baked ham which I made a couple of years ago. This recipe comes from Martha Stewart's Living magazine which I discovered when travelling in America. The ham is baked with cider, honey and pears. Towards the end of cooking, cranberries are added to provide a tangtastic contrast. I added to the recipe by boiling the ham in cider before roasting and using less sugar, preferring to add parsnips to the mix for their sweetness. If you want to use a pre-cooked ham, just start from step three.

This is a delicious recipe which I'm sure would be a welcome addition to the roast dinner circuit. Thanks Martha.

Baked Ham with Pears and Cranberries
Serves 8

2.5kg smoked gammon joint (choose unsmoked if you prefer)
Whole cloves (you will need about 30)
2 litres of cider (you don't need anything too fancy but I didn't want to chance White Lightening!)
1 1/2 cups of honey
1 cinnamon stick
5 pears, quartered and cored (I used Conference pears)
3 cups of cranberries (fresh or frozen)
4 parsnips, peeled, quartered and parboiled.
1/2 cup of soft brown sugar (I ended up using about half of this)
1/2 tsp ground ginger
1 onion peeled and cut in half

  1. Put the gammon joint into a pan of cold water and bring it to the boil. This is to remove any excess salt. Discard the water and rinse the pan of any froth and scum.

  2. Put the onion halves in the pan and put the de-salted joint on top of them. Pour 1.5 litres of cider into the pan and bring it to the boil. Once the liquid has boiled, reduce the heat to a simmer and put the lid on the pan (not too tightly). Simmer for 2.5 hours (adapt the cooking times according to the weight of the joint). You can do this in advance if you prefer.

  3. Preheat the oven to 170 degrees. Remove the ham from the cider and slice the tough rind off the joint leaving the white fat exposed. I'm sure someone clever could think of something to do with the cooking liquid, perhaps a soup base, but I'm afraid I got rid of it.


  4. Score the fat in a diamond pattern and add a clove to each diamond. Place the ham in a roasting dish. Mix the remaining 0.5 litre of fresh cider with 1 cup of the honey and pour the unctuous mixture over the ham. Roast in the oven for an hour (you may need to cover the meat with foil to stop it getting too dark). Baste the meat half way through.


  5. Add the cinnamon, pears and parsnips to the pan and cook for a further 45 minutes (basting twice). Add the cranberries and cook until the pears are soft and the cranberries are about to burst (about 30 minutes). Remove the fruit from the pan with a slotted spoon and keep them in a separate dish covered with foil. Leave the meat out of the oven, covered with foil.

  6. Pour the cooking juices into a small pan and add the remaining half cup of honey, the sugar and the ginger. Bring the mixture to a boil over a medium heat and cook until the mixture becomes syrupy and has reduced by half. Pour the glaze over the ham and cook for 15 minutes.

  7. Remove the ham from the oven, cover with foil and leave it to rest for 15 minutes or until you are ready to eat. Pour any remaining pan juices over the fruit and parsnips. I served the ham with a simple baked potatoes (you want something quite plain to showcase the sweet flavours of the meat and fruits) and green vegetables. Delicious.

* My cooking resolution is to grind my own spices, does anyone else have any good ones?